Mortal Shell 2 Best Shell
Tiel is the best all-around Shell for most players, while Proxima offers the simplest alternative. Smert, Eredrim and the rest fill more specialized roles.
The Quick Answer
Tiel the Acolyte is the Mortal Shell 2 Best Shell for most players. She is the fastest Shell, has a high critical-hit rate and critical-hit damage, can stack poison damage, and uses Shadow Dash to evade and stun enemies. At high level, her stealth can be nearly constant. That combination gives Tiel strong general-purpose value without asking every player to commit to a narrow combat plan.
Choose Proxima the Broodseeker if you want a simpler, more forgiving first choice. Proxima is the easiest Shell to learn, with crowd control and area-of-effect tools that make her an all-around option. Choose Smert if your priority is maximum damage potential and a high skill ceiling. For durability, Eredrim the Venerable is the early-to-mid-game tank choice, while Lazlo fills the tank role later.
This ranking is about first investment and broad usefulness, not a claim that one Shell invalidates the others. All Shells become very strong when fully upgraded. There is no bad Shell; the meaningful differences are how difficult each one is to use and how many situations each one handles comfortably.
Mortal Shell 2 Best Shell Tier List
| Tier | Shells |
|---|---|
| S Tier | 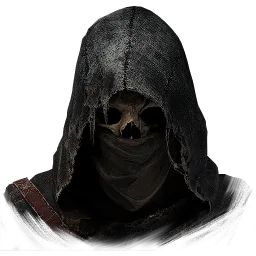 Tiel, Tiel,  Smert, Smert,  Genessa Genessa |
| A Tier | 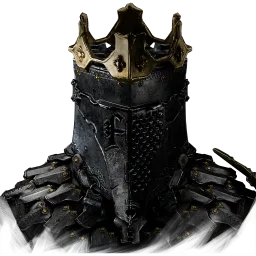 Eredrim, Eredrim,  Proxima Proxima |
| B Tier | 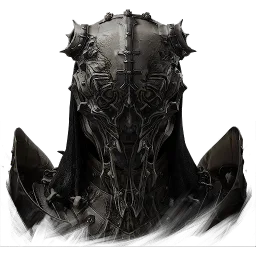 Sariel, Sariel,  Gragu Gragu |
| C Tier |  Lazlo Lazlo |
Mortal Shell II has eight playable Shells, each with a distinct active ability and stat tendency. The tier list below reflects player reports and community consensus about first picks, ease of use and long-term value.
S Tier: Tiel, Smert and Genessa
Tiel the Acolyte
Tiel is the clearest recommendation for a first Shell. Her speed, critical-focused damage, poison stacking and Shadow Dash cover offense and defense at the same time. The ability to evade and stun with Shadow Dash gives her a way to create space, while her high-level stealth can be nearly constant. Community consensus puts Tiel in S tier and treats her as a strong first pick for most players.
Smert
Smert is also S tier, but she demands more from the player. Her Miracle can stop time, and she heals through attacks while in Fight Stance. Those tools create the highest operating ceiling in the roster, with a high-risk, high-reward pattern: low health is also the edge of death. Smert is the answer for players who want to turn precision and confidence into exceptional damage.
Genessa (Wayward)
Genessa belongs in the top group for players who want a more forgiving soulslike experience. She is durable and uses Resolve to create clones that attack. Player reports place her between A and S tier, while her health and clone-focused approach make her especially suitable for newcomers.
A Tier: Eredrim and Proxima
Eredrim the Venerable
Eredrim is the straightforward warrior. Shoulder Bash breaks enemy defenses, and Executioner can finish enemies at low health. His high Durability makes him a tank, and player reports describe him as a strong, reliable choice for players who want to stand their ground and survive pressure.
Proxima the Broodseeker
Proxima is the most accessible all-around alternative to Tiel. Her crowd-control and area-of-effect toolkit is versatile, and she is available early. Community rankings place her in the top two tiers because she is easy to learn and broadly capable. If Tiel's speed and stealth do not appeal to you, Proxima is the simplest answer to the best-first-Shell question.
B Tier: Sariel and Gragu
Sariel
Sariel uses a Pain mechanic to gain invulnerability, but taking a hit removes all Pain and it cannot be recovered. That makes her a demanding choice built around avoiding mistakes. Community rankings place Sariel in B or A tier, which reflects her potential rather than her accessibility. Pick Sariel for a near-perfect, no-hit style, not because she is the easiest Shell to start with.
Gragu
Gragu is powerful in single-target boss fights but weaker against groups of ordinary enemies. His unlocking and development are also cumbersome. That focused strength puts him in B tier in community rankings.
C Tier: Lazlo
Lazlo
Lazlo combines pure tankiness with wide-area damage and executions, but his unlock comes very late, deep in the Crypts of Mammon. Community rankings place him anywhere from A to C tier, reflecting both his late unlock and his strong defensive toolkit. He is a strong later option, but not the answer for an early investment.
Best Shell by Playstyle
For beginners and most players: start with Tiel. Her speed, stealth and forgiving toolkit explain why community consensus puts her at the top for a first pick. If you want the easiest learning curve and broad crowd-control coverage instead, choose Proxima.
For maximum damage potential: choose Smert. Time control and attack healing in Fight Stance give her an extraordinary ceiling, but the low-health risk is part of the choice. For a perfect, no-hit approach: Sariel is the specialist option because her invulnerability depends on preserving Pain.
For a tank: choose Eredrim in the early or middle portion of a run. His high Durability, Shoulder Bash and Executioner support a direct warrior plan. Choose Lazlo later if you want pure tankiness, large-area damage and executions and are already able to reach his late unlock.
For a durable newcomer: consider Genessa. Her health and Resolve-powered attacking clones make her a strong fit for a player who wants room to learn the combat flow. Player reports vary between A and S tier, but the underlying recommendation is consistent.
Who Should You Invest In First?
Glimpses, the upgrade currency, are limited. Community reports suggest you may fully level only about three Shells in a single playthrough, so choosing where to spend them is a central decision. Do not treat the tier list as a requirement to upgrade an S-tier Shell if its playstyle does not suit you. A fully upgraded Shell is powerful across the roster, and there is no bad answer.
A practical first decision is therefore simple: invest in Tiel for the broadest recommendation, Proxima for the easiest alternative, Smert for high-risk damage, Eredrim for early-to-mid-game durability, or Genessa for a beginner-friendly health-and-clone plan. Once you reach Marrow Keep, Proxima and Tiel can be obtained for free, giving you two particularly strong ways to evaluate the roster before committing further.
Bottom line: Tiel is the best all-around Shell for most players — fastest, stealthiest, and forgiving; pick Eredrim for durability or Smert for maximum damage potential.
Community Rankings: Smert vs. Tiel
A launch-week community ranking built around Bond upgrades disagrees with our quick answer on the top spot: it places Smert first, Genessa second and Gragu third, with Tiel outside the top three. The disagreement is not about facts — it is about what "best" means.
Rankings that put Smert on top weigh her ceiling: the time-stopping Miracle and Fight Stance healing let a confident player erase mistakes and reach the highest damage potential in the roster. Rankings that put Tiel first (as this page does) weigh consistency: her speed, stealth and poison perform in almost every fight without demanding near-perfect spacing. If you are confident in your reads, Smert is the community's pick for maximum output; if you want a first Shell that performs everywhere, Tiel remains the safer recommendation.
Genessa at second and Gragu at third show how much Bond investment factors into community rankings: both sit higher on Bond-focused lists than on first-impression tier lists. The practical takeaway is the same as ours — invest in the Shell whose playstyle you trust — but it is worth knowing that Bond-focused rankings consider Smert, Genessa and Gragu the strongest long-term investments in the roster.
Both conclusions point the same direction: Bond upgrades are the highest-value spending in the game, and the "best Shell" question is really a question of which Bond you want to finish first.